If you are installing a complete Bell Pull system, we advise that before you fit the Internal Bell and any pulleys required you fit the external bell rod as shown in our previous blog
Tolls Required
Drill – 8mm masonry drill bit – Slotted screwdriver – Small hammer – Scissors
Fitting Instructions
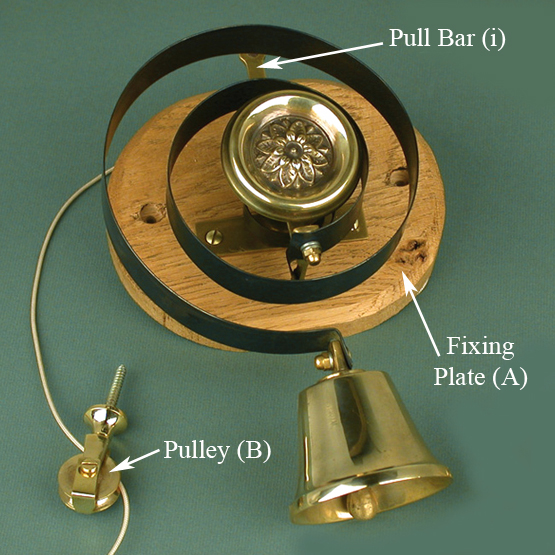
Step 1 – Mark the position of the two holes in the wooden fixing plate (A) on the Butlers Bell. For best results the hole in pull bar (i) should be at the same height as the bottom of the V in the pulley wheel in which the cord runs (try to keep the cord horizontal) Drill two 8mm holes, plug and secure fixing plate (A) with the screws provided.Step 2 – Connect the pull cord to your bell pull and thread it through the pulleys you have inside the house. Tie the loose end to the hole in pull bar (i) using a double knot. Ensure it is captive and taut.

Your bell pull is now ready for use.
Step 4 – (optional) Fix pulley (B) if your bell cord requires more support.
Step 5 – (optional) Use pulley (C) if you need to change the direction in which your pull cord runs from vertical to horizontal. Before fitting, ensure that the bottom of the V in the pulley wheel is aligned both vertically and horizontally with other pulley / pull points.
Cleaning
Dust periodically with soft dry cloth.
No comments:
Post a Comment